Hello everybody ! Many people have some old apple computers laying around in their attic or somewhere else, and probably, one day, decide to try and revive them. If you are one of those people with a G3, G4 or G5 Mac, and don’t want to bother yourself with trying to find old installer CDs, I will show you how you can install Mac OS 10.3 (not tested), 10.4 and 10.5 on your PowerPC from a USB stick. Now you may think that you already can do that by just holding the Alt key, but these machines are a bit too old for that. Thats why we gotta force them, through Open Firmware Mode !
Things you´ll need:
- A PowerPC Mac with a G3, G4 or G5 processor
- A modern intel Mac
- A 4gb or larger (8gb recommended) USB stick
- A copy of Mac OS 10.3, 10.4 or 10.5
- A tiny bit of patience !
- Panther minimal requirements: 233mhz G3 processor and 128mb of RAM
- Tiger minimal requirements: 300mhz G3 processor and 256mb of RAM
- Leopard minimal requirements: 867mhz G4 processor and 512mb of RAM
Here are the download links to Mac OS 10.3, 10.4 and 10.5:
- 10.3: https://winworldpc.com/product/mac-os-x/103 (10.3 is in 3 separate parts and is very difficult to install from USB. You should better burn 3 CDs with the files.)
- 10.4: https://drive.google.com/file/d/0Byhts_pMay1hUnRlS1M4WDBLd28/view
- 10.5: https://drive.google.com/file/d/0Byhts_pMay1hWHdyOWhGd1Vkdnc/view
So, to start off, download the version of your choice. I would recommend first trying 10.4, because it is compatible with more Macs. Once you downloaded Tiger (the name of Mac OS 10.4). You want to plug your USB stick into your intel Mac, open Disk Utility, and format it as Apple Partition Map with the name USB. Once done, restore your stick from the Tiger dmg. You may need to scan the image, for that, whilst in disk utility, go into ‘images’ and select the top option. After the restoring process is done, right click on your usb in disk utility (left side, where every disk is shown) and look for its partition number. Could be 3,2,1 and so on. Now you can eject your usb, and plug it into your PowerPC. Make sure that it is the only USB device, except for your keyboard and mouse. Now comes the fun part 🙂

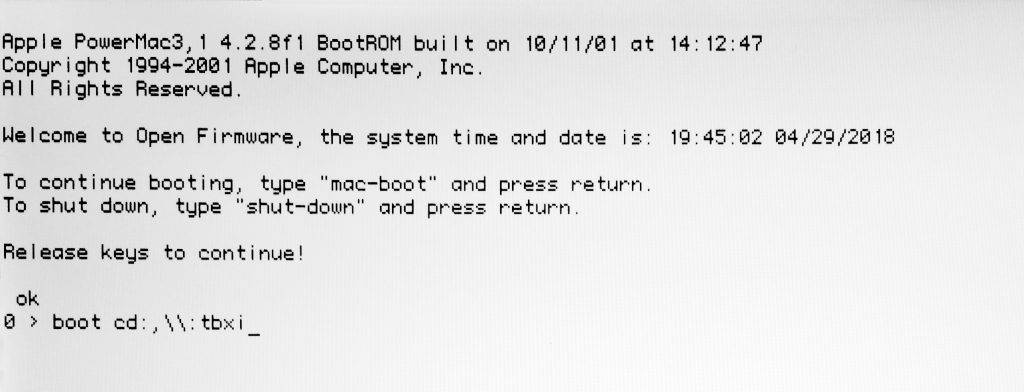
Congrats ! You’ve made it until here ! Hopefully without any problems. But that was the easiest part; now starts the more difficult part, if you don’t know what you’re doing. First things first, to start your Mac into OF mode, you need to turn it on, and immediately hold ‘command’, ‘Alt’, O and F all together. Hold those 4 keys down, until you see the screen shown above. After you successfully booted your Mac, you gonna wanna type ‘dev / ls’ and hit enter. Now there will be a long list of all the stuff inside of your computer. At the end of the list you will most likely see something like ‘More (space, cr,q) and so on. Just press space once. Now at the end there should be ‘0’ with an arrow and underscore. Before typing any other stuff, you will have to find your usb in the list. It should be towards the end and look something like this:
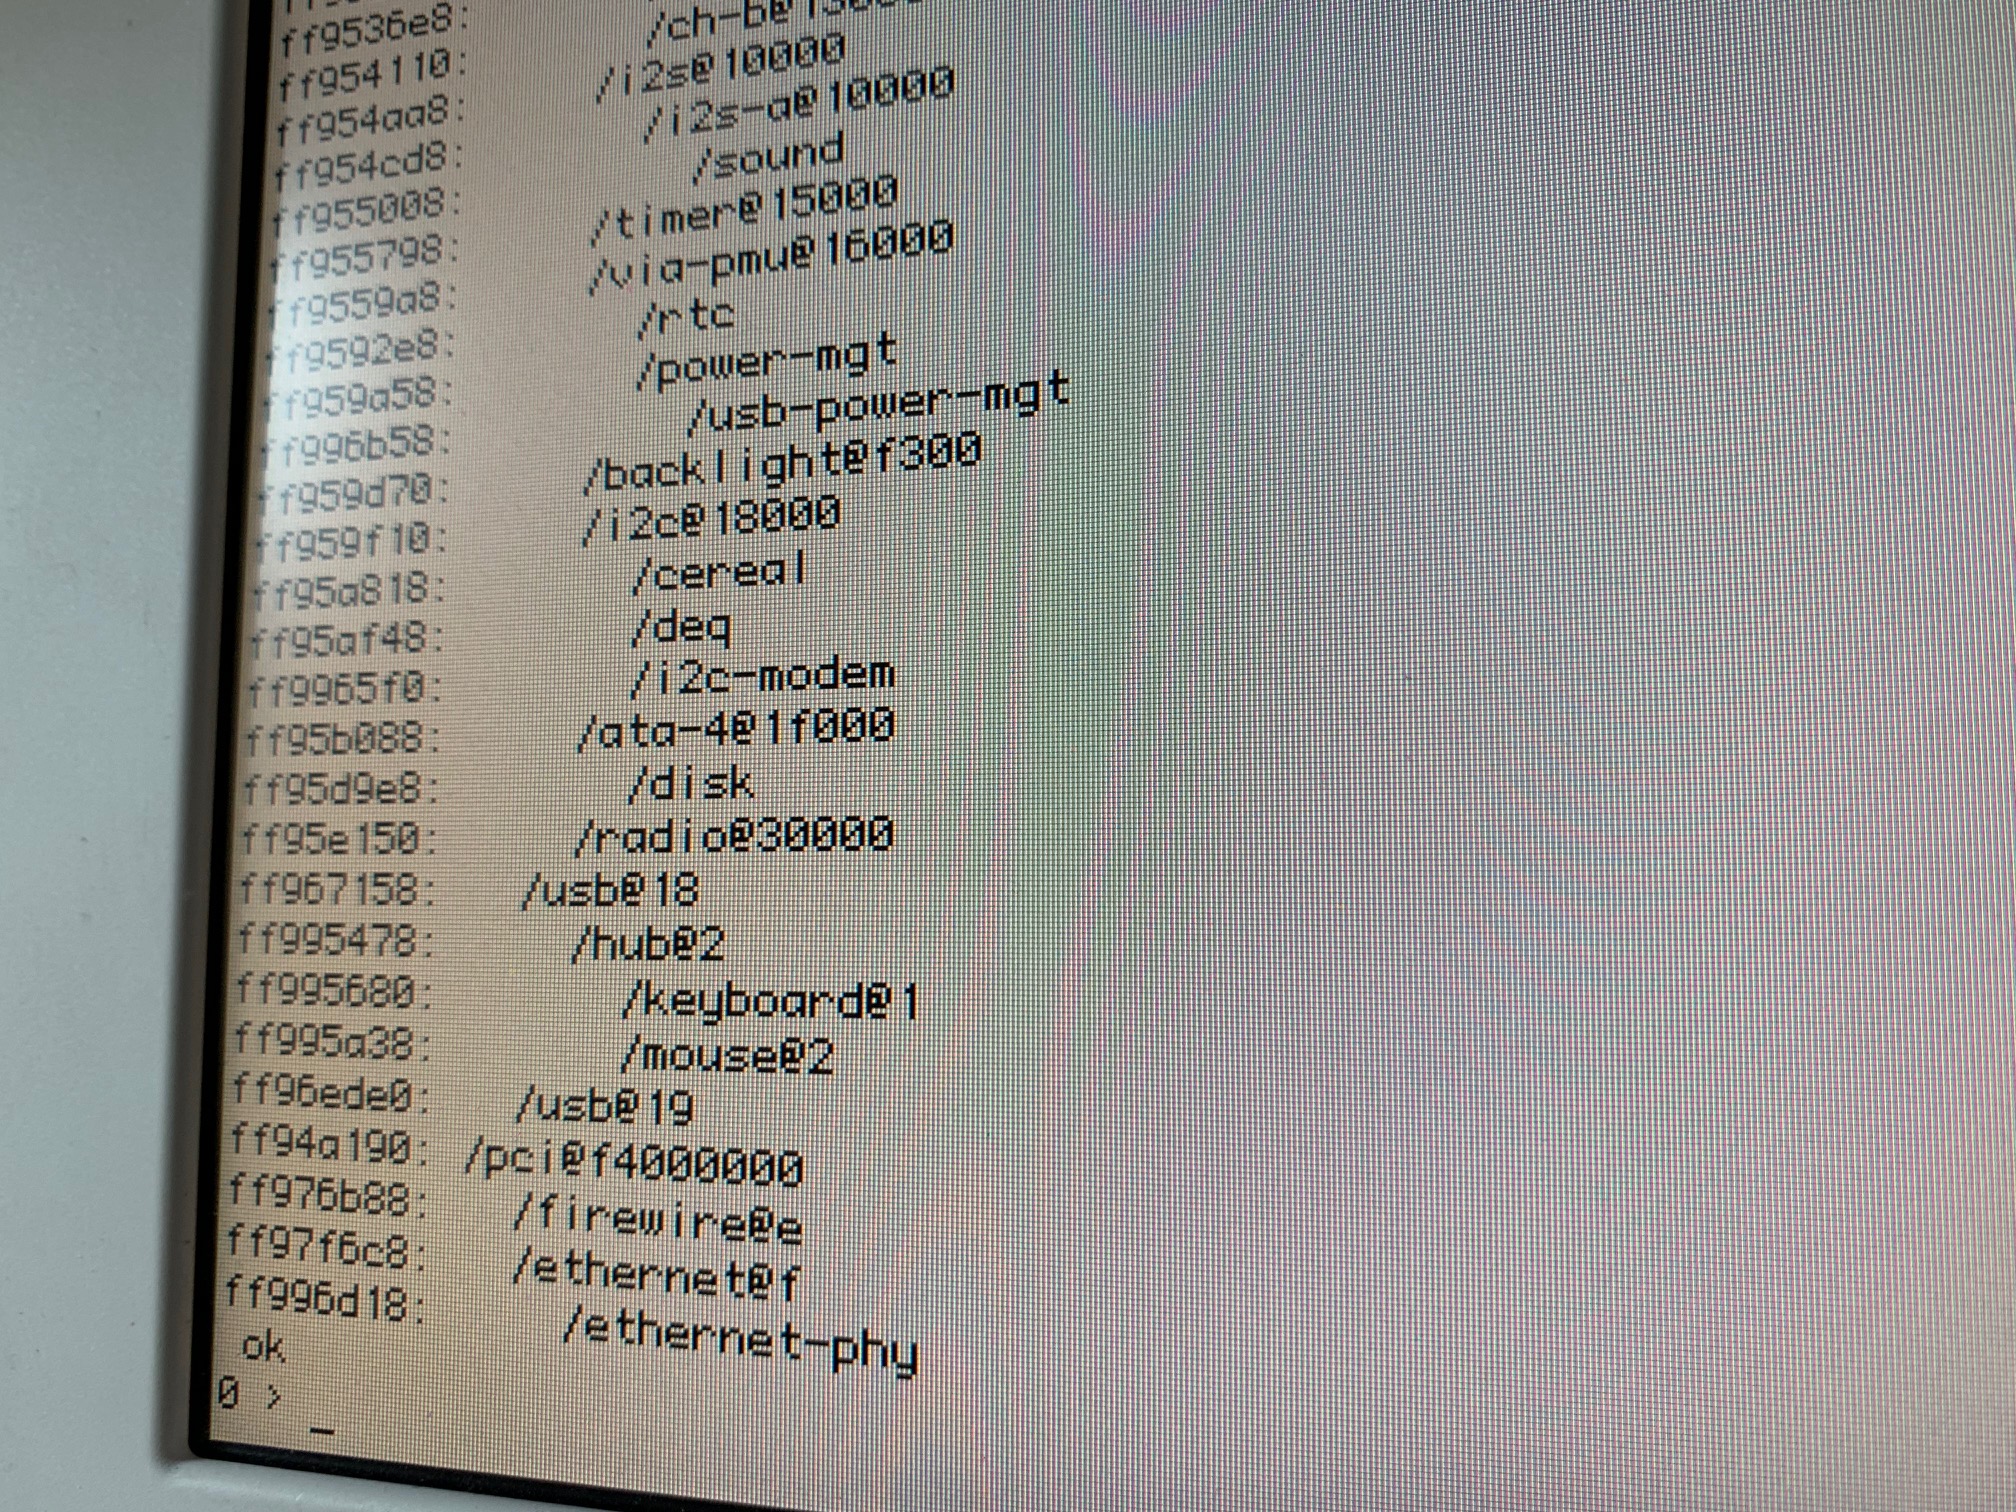
Your USB will be /usb@xx (here usb@18) and below there should be /disk@xx (here disk@1). Are you ready to type now ? Alright then, let’s go !! ( Tip: press the up key to prevent rewriting everything )
After each line press Enter
- /pci@f2000000/usb@xx/disk@xx
- devalias ud /pci@f2000000/usb@xx/disk@xx
- dir ud:x,\ (instead of x write the partition number of your usb)
If everything went right, there now should be a list of the stuff that’s on your usb. Now type:
- boot ud:x,\System\Library\CoreServices\BootX
If you typed everything like shown, your Mac should now happily boot from the USB ! You can now continue without me, and install OS X on your old machine, assuming it has enough RAM, and is compatible with your Mac ! If you encounter any issues, or something is unclear, just comment down below, write me a DM on instagram @idevice_collector or email me: idevicegohro@gmail.com. I hope you enjoyed this tutorial, and we will see us in the next one !
-Gohro
